DIY: Giant Cupcake Smash Cake
Learn how to make a delicious Cupcake Smash Cake at home for your little one’s First Birthday or Smash Cake Pictures!
Learn how to make an adorable Giant Cupcake Smash Cake at home for your little one’s First Birthday or Smash Cake Pictures!

*Updated 8/1/19 to include baby Jo’s Cupcake Smash Cake
Listen,
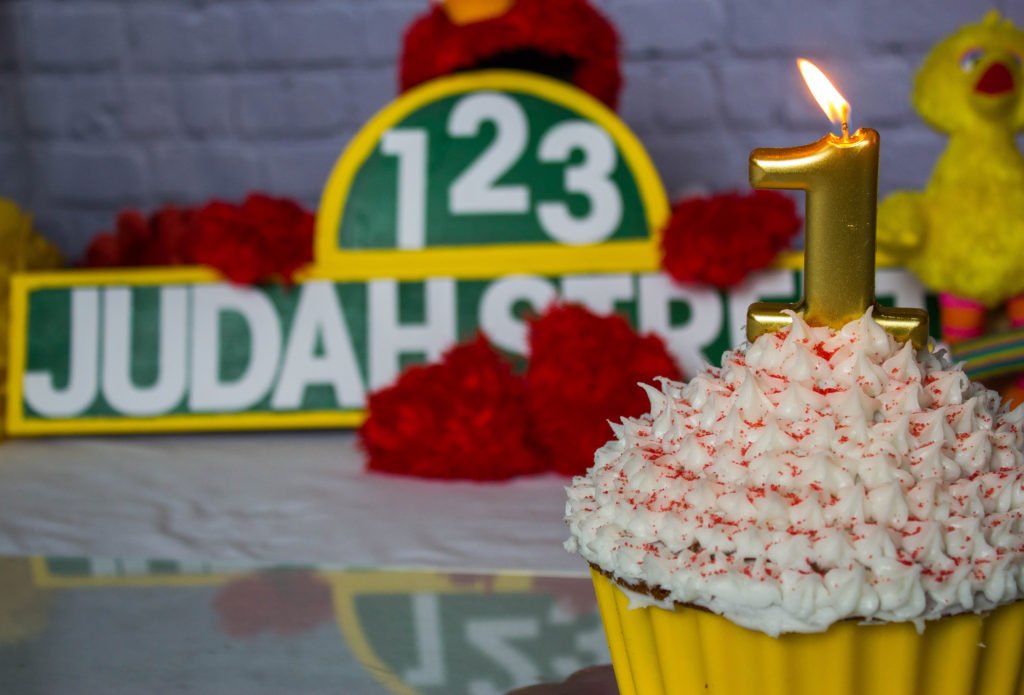
I’m no baker or anything and my icing skills are horrible, but I am so proud of how this smash cake cupcake turned out!
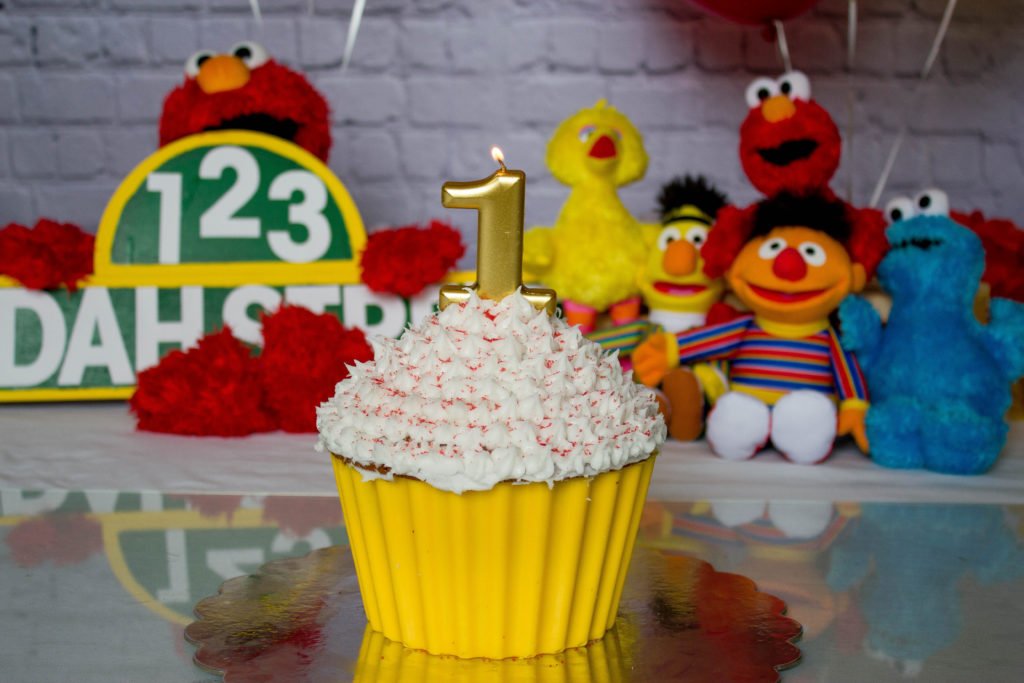
It turned out sooo much better than I had anticipated.
It’s definitely not perfect but I’m pretty sure I’ll be making these giant cupcakes for years to come!
Also, if you’re interested in how we created our own little in-home studio for both of our boys’ smash cake pictures, check out my D.I.Y Sesame Street Themed Cake Smash Pictures post here
What You Need:
Wilton’s Candy Melts
Pastry Brush
Two Boxes of a Cake Mix of Your Choice (I used a regular yellow cake mix)
Eggs
Vegetable Oil
Water
Non-Stick Spray
Cake Board (optional)
Cake Turntable (optional)
Sprinkles (optional)
Icing (or you can make your own)
Cooling Rack
Candle or Cake Topper
Patience
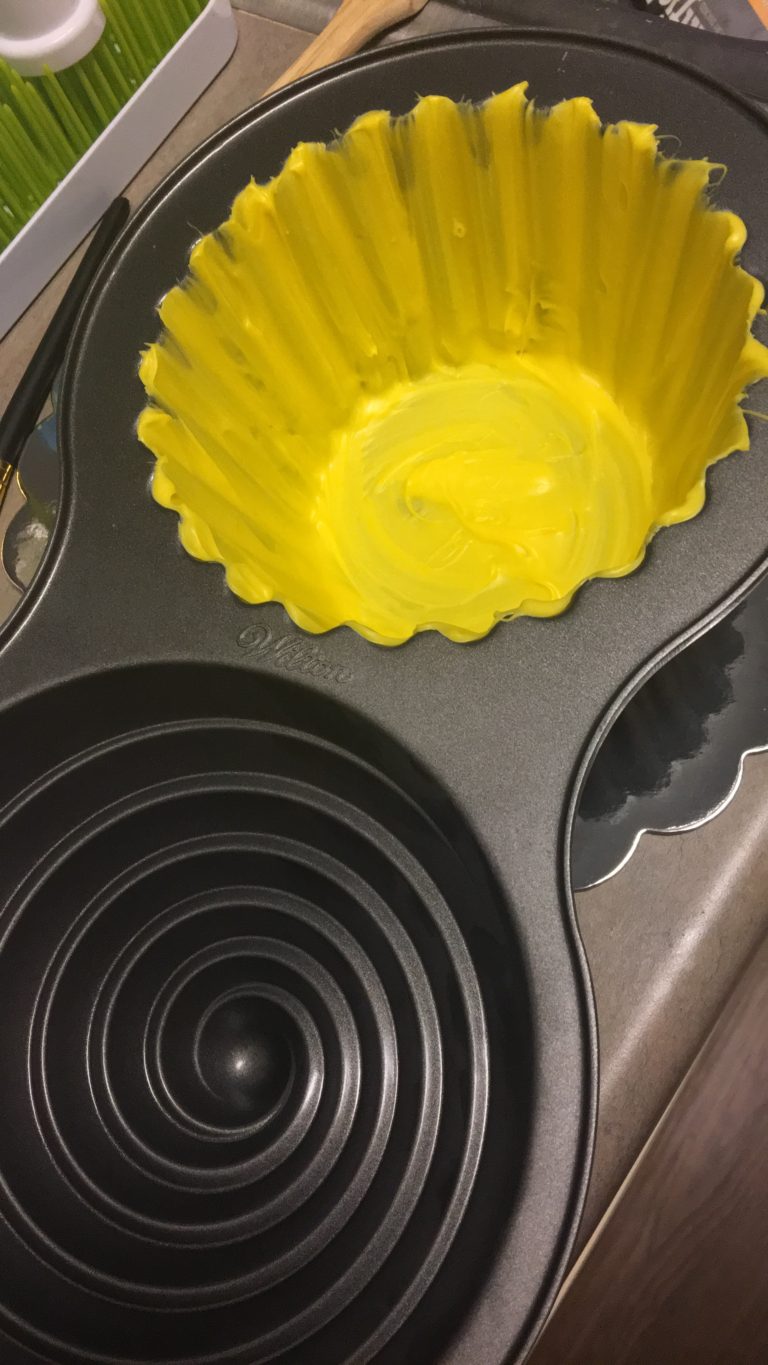
First, pour half a bag of Candy Melts into a microwave-safe container.
Next microwave the Candy Melts for 30-second intervals until the candies are completely melted.
Once melted, take your pastry brush and brush the candy up the sides of the bottom half of the giant cupcake pan (No non-stick spray required)
Next place the giant cupcake pan in the fridge for about 10-15mins to allow your candy melt mold to harden.
Once your mold has hardened, repeat steps 1-4.
You wanna work a little quicker on step 3 the second time around. Since the pan is cold, the Candy Melts set a lot quicker than they did the first go-round.
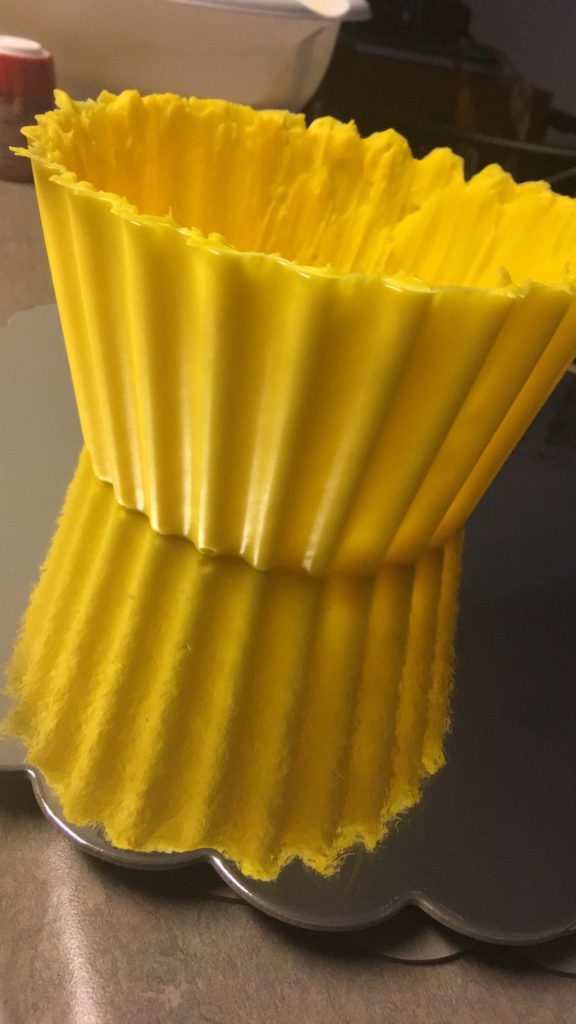
Once your mold is completely set, simply flip the pan over and the mold should slide right out.
On To The Cake…
As I stated earlier, I used box yellow cake mix for the cake (although I’m sure any cake recipe would work.)
The cake mix called for 1 cup of water, 1/3 cup of vegetable oil and 3 eggs. However, I did doctor it up a little (scroll down to the recipe for specifics).
In addition to the cake mix, I added more eggs, water
6 eggs
2 cups of water
2/3 cups of vegetable oil.
Once your batter is mixed, it’s a good idea to go ahead and measure out the exact amount of batter that you will need for the top and bottom halves of the cupcake pan.
For the top half you need 2 and 1/2 cups
For the bottom half, you need 3 and 1/2 cups
Bake your cake in the oven on 325 degrees Fahrenheit for about an hr (I actually took mine out after 50 mins).
Make sure to prep your pan with non-stick spray before you pour the batter.
Once your cake is done, it should look a little something like this!
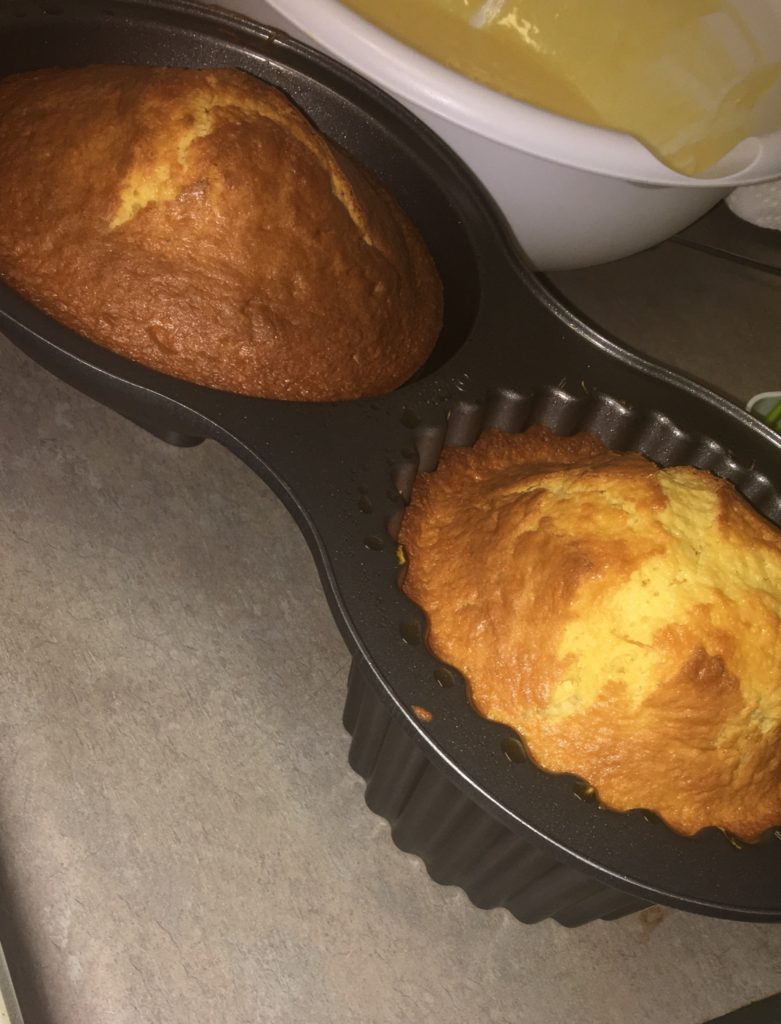
Allow your cake to cool for about 10 to 15mins.
Then flip it over onto the cooling rack to allow it to cool completely.
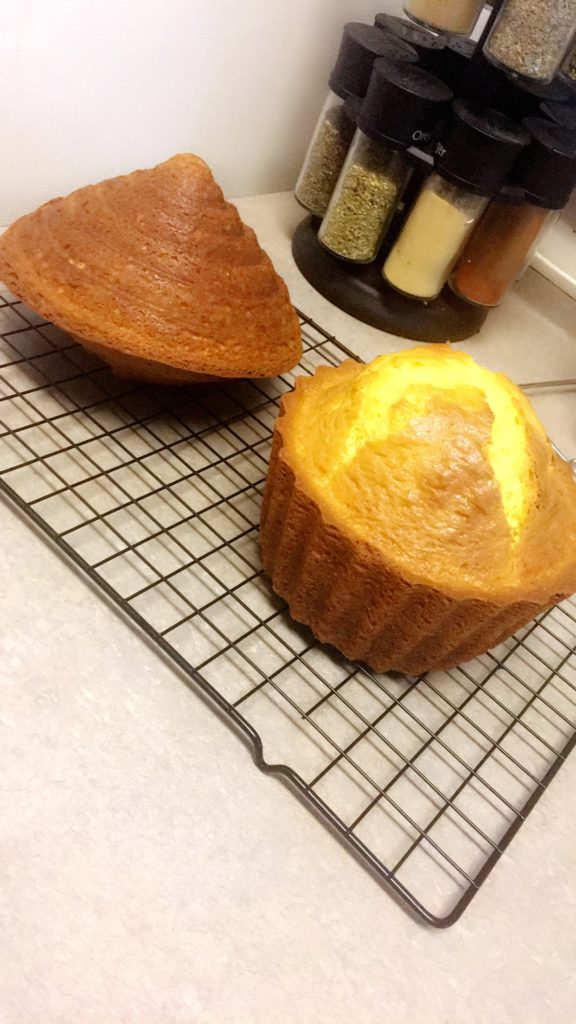
Once your cake has cooled completely, level the top and bottom so that the top of the cake can sit flat on top of the base.
Next, take a knife and trim around the sides of the bottom half of the cupcake (to remove the edges that are a little too crispy).
Grab your chocolate liner and coat the bottom with icing. This will help the base of the cake stick to the cake board so that it doesn’t slide around.
Next, coat the top of the bottom half of the cake with icing and then ‘glue’ the top half down on top of it.
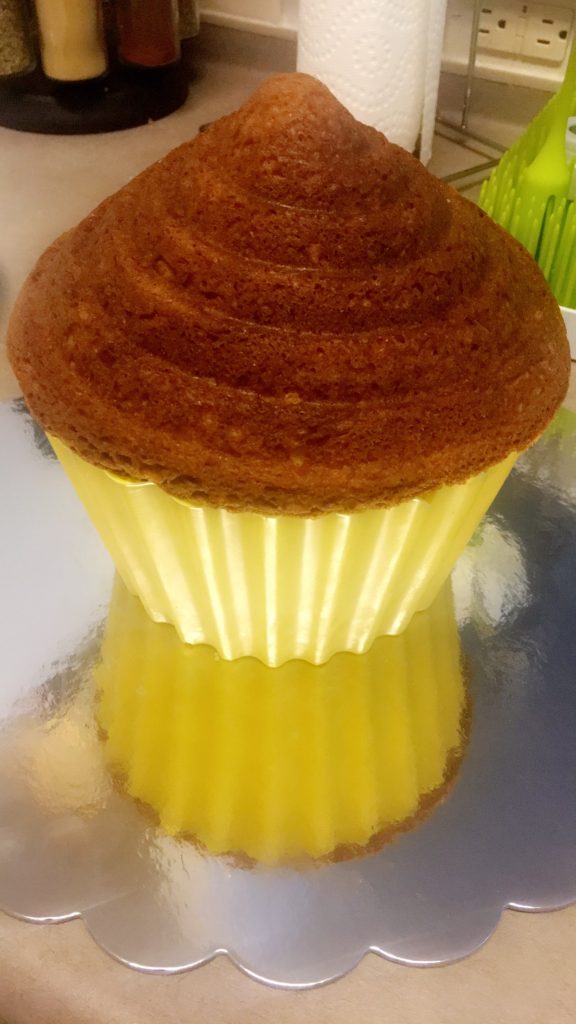
Next, I added a crumb coat to the top of my cake and let it sit in the fridge for around 5 minutes.
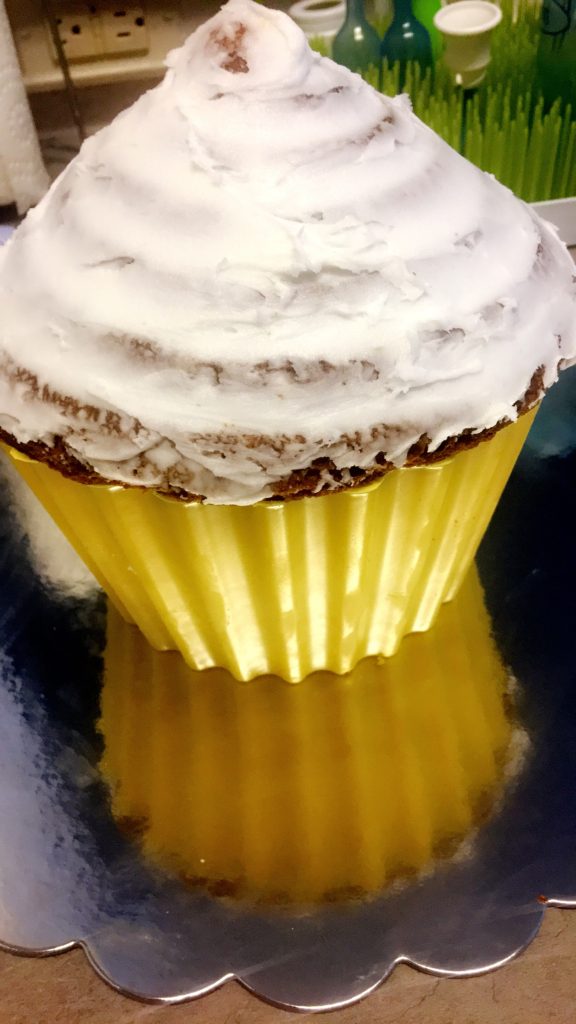
The crumb coat doesn’t have to be neat, it just seals in the crumbs so that they don’t show in the final product.
Now here comes the anxiety inducing , I mean, fun part.
Decorating your Giant Cupcake! I used Wilton’s White Decorating Icing that came with a star tip to decorate my cake.
However, I didn’t really enjoy using the Decorating Icing, so in the future, it’s likely that I’ll attempt to make my own icing and invest in an icing bag and couple of decorating tips.
Add sprinkles, a candle, cake topper, or other finishing touches and you’re done!
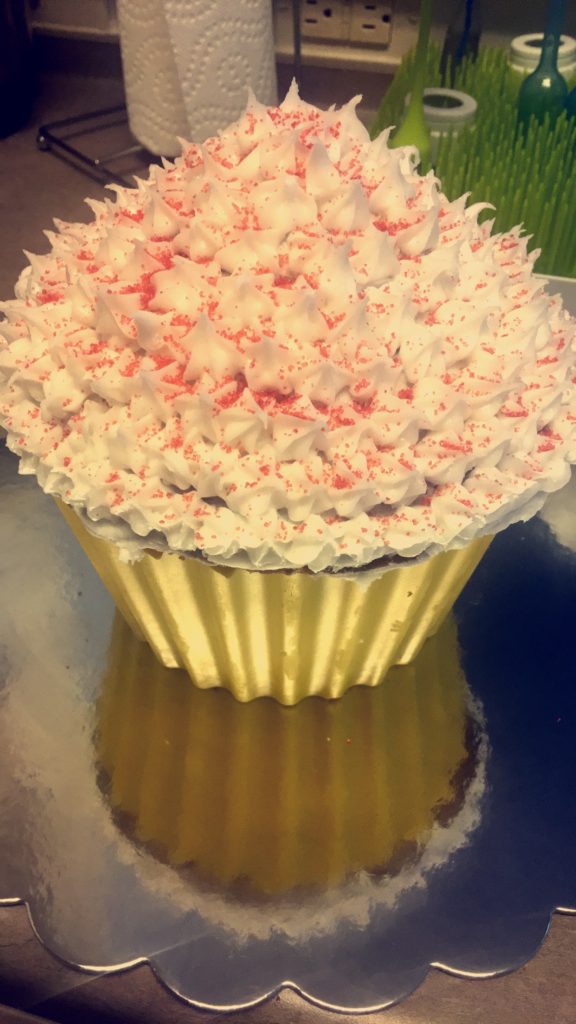

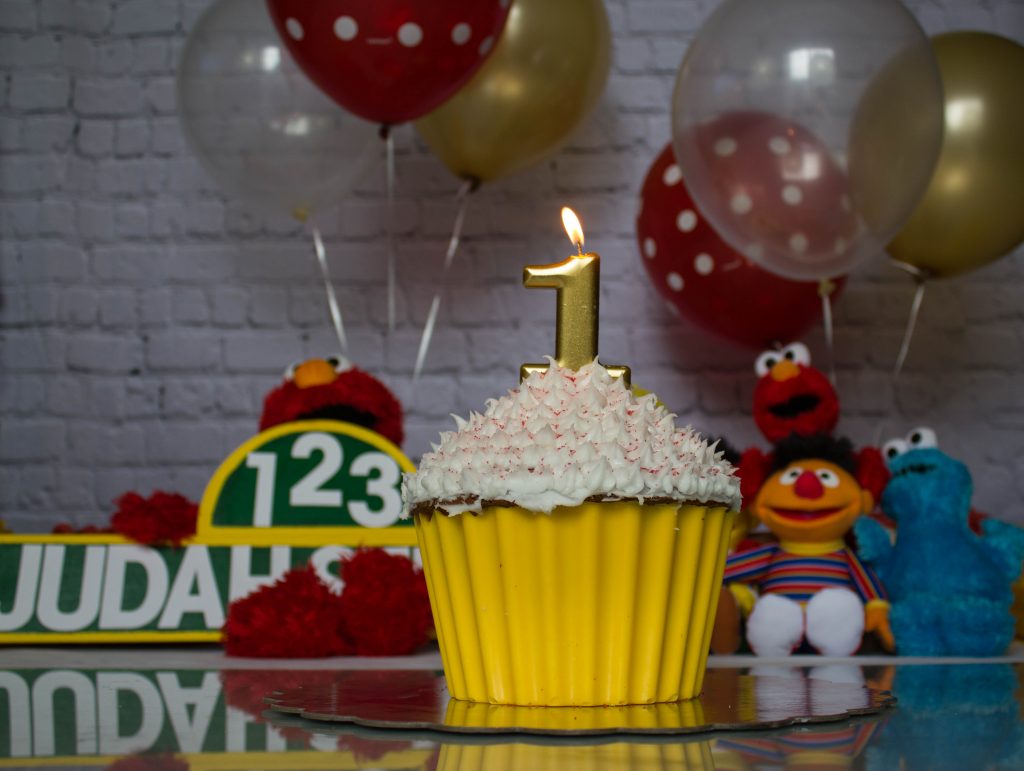
This cake can be made for any occasion so don’t feel limited to only use it for smash cake purposes. The possibilities are endless!
Plus, we saved a TON of money by making it ourselves!
Have you ever made a Giant Cupcake Cake?
If so, how’d it turn out?
If not, give it a try! You won’t be disappointed!




I love how it turned out! What a cute cake! His party looked so cute!
Thank you!!
This is so cute. I have never seen a large cupcake like that before!
I saw it on Pinterest and I had to try it
Oh my gosh!! This is seriously SO cute!!! I’m in love 😍😍 you said you’re NOT a baker?? Could have fooled me! I’m pinning this, for sure!
Thank Youuu! It turned out so much better than I thought it would!
Haha I didn’t know the giant cupcake mold existed! How fun! I will need to try this recipe for my kids!
Definitely let me know if you do! I’d love to see how it turns out
How adorable is this cake?! I totally tried to make a cake for my sons first birthday…and failed miserable! I can cook, but for some reason, baking is my weakness 🙁 ughhh. You did such a great job on this though, love it!
Thank you!!! I’m a HORRIBLE baker so I was so surprised that it turned out as good as it did!
How did you baby do with the chocolate liner? Could it be smashed? Was going to do one for my little ones cake but then didn’t know if she could smash it or not
Hi! How did your baby do with the chocolate bottom? Was he or she able to still smash it?
Hi Sarah, We ended up cutting into it halfway through the shoot. He was able to smash through the top part of the cupcake but the chocolate was too hard for him to smash through. I hope this helps!
It does! Thank you so much!
Help! I just got my candy melt mold out of the fridge and tried to “slide” it out- nothing! I’ve tried banging it on my counter, nothing!
Oh no!! So this actually happened to me last month when I made this cake again for my youngest last month. I ended up having to do it over with two things in mind:
1. I made sure that the first layer of candy that I brushed in was as smooth as possible.
2 When this happened to me, my candy melt mold had hardened at the top, so I couldn’t slide it out. So when I did it over, I wiped the edges of the top of the pan before I put it in the fridge to cool.
I hope this helps!